Showing posts with label star framelits. Show all posts

Tuesday, July 21

WEEKLY DEALS GOOD UNTIL JULY 27

HEY BLOGGIES,

The Weekly Deals are awesome this week.  For those of you who do NOT as yet have the Star Framelits, they are on sale this week.  Get them NOW to be ready for Christmas cards and decorations!!

The Fast Fuse Refill is a great reduced price.  Stock up now and be ready to make your holiday items.


Blackberry Bliss 5/8 Striped Cotton Ribbon by Stampin' Up!


Price: $7.00 $5.25
Fast Fuse Adhesive Refill by Stampin' Up!


Price: $7.50 $5.25

Fun Frames Textured Impressions Embossing Folders by Stampin' Up!


Price: $8.50 $5.95
Go Wild 8-1/2 x 11 Cardstock Assortment Pack  by Stampin' Up!


Price: $7.00 $5.25
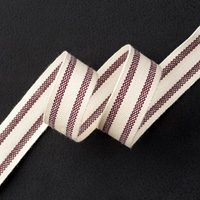
Hello Honey 5/8 Striped Cotton Ribbon by Stampin' Up!


Price: $7.00 $4.90
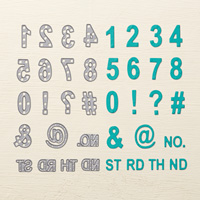
Little Numbers Thinlits Dies by Stampin' Up!


Price: $20.00 $15.00
Schoolhouse 8-1/2 x 11 Cardstock Assortment Pack  by Stampin' Up!


Price: $7.00 $5.25
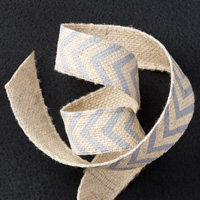
Smoky Slate 5/8 Chevron Ribbon by Stampin' Up!


Price: $7.00 $5.25
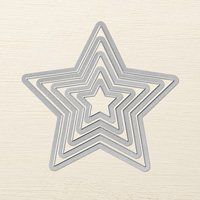
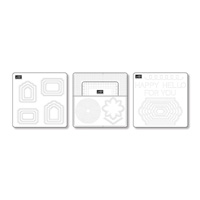
Stars Framelits Dies by Stampin' Up!


Price: $27.00 $20.25
Tangelo Twist 5/8 Striped Cotton Ribbon by Stampin' Up!


Price: $7.00 $5.25

Updated Essentials Paper-Piercing Pack  by Stampin' Up!


Price: $8.00 $6.00

IF YOU HAVE ANY QUESTIONS, LET ME KNOW IMMEDIATELY.  AS ALWAYS, THIS SALE IS WHILE SUPPLIES LAST.

Friday, July 3

HAPPY INDEPENDENCE DAY AMERICA

HEY BLOGGIES,

Happy Independence Day to all and a great big THANK YOU to all our veterans who have helped keep our land free.

Today I have a fun interlocking star card with a July 4th color theme.  I had this card in my mind for a while when I saw one with circles, but I wanted to try it with star framelits instead.  Tell me what you think, won't you?

 Cherry cobbler, night of navy and smokey slate card stock was used.  I used the Star Framelits to cut out the stars and adhered them on the side fold card to have them interlock as the way to close the card.

 Here it is completely closed so you can see how the stars fit together.  The sentiment banner uses Pewter embossing powder and the sentiment is from the Kinda Eclectic stamp set.  The little die cut is from a package I got from Michaels last year after the holiday was over.

 I used a French translation stamp set of Lots of Thanks and pewter embossing powder again for the inside of my card.  I used the inside piece of the interlocking star and adhered it where the two fit together if that right flap is closed into the inside.

One more look at the closed card.  The little polka dot flower is from the Festival of Trees paper pad from the holidays. Oh, and the border punch is retired but I still love it!!

Thanks for stopping by.  Stop at Sketch Frenzy Friday to see more cards with this week's sketch.

I also entered this at The Friday Mashup - use 3 elements.  Go see what else go entered there as well.

Saturday, June 27

TEXAS LONE STAR CARD

HEY BLOGGIES,

Today I made a Texas Lone Star Card.  I actually made four of them.  It is a very easy card to create and I really enjoyed the process.  I saw this card on Frenchie's blog (France Martin) and knew I had to case it!!  Thanks Frenchie for the idea and video.  It was so fun to make.

 Here is the first card I made.  The star framelits die is used and then you score from the tip of each star point to make it be a 3D star.  I used the Woodgrain embossing folder, but Frenchie used the woodgrain stamp for her card.

 This second card here I stamped the sentiment from You've Got This stamp set in Cajun Craze ink.  I realized immediately it was not showing up very well.  So, I created a tag with a layer behind it and adhered it on top of the stamped sentiment.  I think it looks much better below, don't you?


Here is the one I sent in the mail today.  I added the 1 1/4" burlap ribbon near the bottom, and then some strips from the ribbon behind the star and as a knotted element on top of the star.

The embossing is supposed to look rustic and rusty, so after you use versamark ink and add gold embossing powder, you rub some of it off before you heat set it.  Then after it has cooled, you add sponged ink here and there to add some color.  I embossed it on some light blue retired card stock, then sponged cajun craze ink over it here and there.  It doesn't show that much, but it makes it very rustic looking.

Thanks for stopping by, and thanks to Frenchie again for this idea.  L.O.V.E.   I.T.

YeeHaw, Go Texas!!

Friday, July 18

STAR FRAMELITS WINDOW CARD

HEY BLOGGIES,

Today I have a card that I made using my SKETCH FRENZY FRIDAY sketch. I created the sketch before I realized that 3 of the framelits cannot make it all the way down the card diagonally. So of course I had to change it up a bit.

Here is my sketch for this week:


And here is my card.

 I used cherry cobbler and daffodil delight cvard stock.  Then I used cajun craze, pumpkin pie and cherry cobbler inks to both sponge and stamp the layer behind the stars, as well as the front of the card.

 I used a bitty star punch for the two little stars of daffodil delight,  The red button is from the brights collection of buttons.
I created the banner myself by scoring two places on each end of the strip of paper and then cutting a flag on both ends.

Hope you enjoyed my card and my sketch this week.  Won't you create a card and share it with us on SKETCH FRENZY FRIDAY CHALLENGE?

Friday, July 4

HAPPY INDEPENDENCE DAY TO ALL!!

HEY BLOGGIES,

I hope you are planning some fun family time on this long holiday weekend.  Using the Sketch Frenzy Friday Sketch below, I made a card with a 4th of July feel.  Here is this weeks sketch:


And here is my card:

 I used a red, white and blue color theme to go along with the stars I featured on my card.  The wonderful new Star Framelits enabled me to cut out the largest star from my red cardstock, and also to cut that into a smaller star to add back in.

 I created my background "designer paper" by using the middle of a flower stamp and repeatedly stamping it in red and blue all over the background to look like fireworks exploding.

Here you can see more of the background paper I created as it peeks out from the die cut star in the middle of my card.  I added some sequins and some printed vellum for accents and as one of the layers on my middle star.  I also used the small star punch from the punch pack to create the smallest star.

I hope you enjoyed my patriotic thank you card.  I used the French "thank you" for my sentiment just for a bit of whimsy.  I have made several of these cards to give to my customers this month as my thank you for selecting me as their demonstrator.

Place an order with me and I will be happy to send a thank you card to you, too.

Thank you for stopping by.  Won't you stop at our Sketch Frenzy Friday blog and see what the other design team members have created for you?  And we would LOVE to see YOUR creation also.

Happy 4th!!