Thursday, December 24

MERRY CHRISTMAS

MERRY CHRISTMAS to all as we celebrate the birth of our SAVIOR, JESUS CHRIST.


Monday, December 21

SIMPLE BUT ELEGANT CHRISTMAS CARD

HEY BLOGGIES,

Surprise!!  I am back with a blog post. I am so sorry it has been a while  My creativity was NEGATIVE, ZERO, ZILCH, NADA.  But I persisted to keep looking at creative ideas from other stampers hoping my lost creativity would kick in.  YIPPEE - yesterday I FINALLY got a little bit of creativity itching to come out and I did three Christmas cards and I liked them and decided to go with them for this year.

Thanks so so many stampers who share their ideas on their blogs, and on Pinterest so that I was able to figure out what to do by combining several of those ideas.

Here are my cards.  Each one is just a little bit different, but I really like them!!

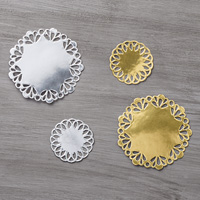
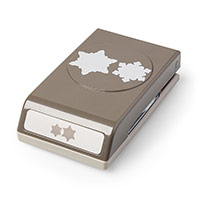
 Crumb cake and Night of Navy ink; ivory, crumb cake and night of navy card stock; Woodlands embossing folder, decorative label punch, Lovely as a Tree stamp set plus a retired set for the sentiment.


Believe it or not, these are all made with the same colors, but different intensities make them look a bit different.

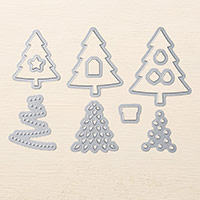
 I love how the evergreen trees are peeping out from behind the birch trees, don't you?

Thanks to many stampers, especially Dawn Ochelfski, Ann Craig, Dee Slater, Dianne Sisneros, Anna Masciovecchio, France Martin, Billie Moan, Sandy Griffith, Angie Walters, Debbie Henderson, Nikki Meyers, Ruthie Martini, Amy Jasper, Diane Dimich, and so many more!!

IF you have any questions, let me know.  I am off to the Post Office to mail my cards.  (Yes, I know most will be a day or more or more more late, but that's the way it is this year for me.) LOL

Thanks for stopping by!!

Tuesday, December 1

SIMON SAYS STAMP DECEMBER CARD KIT

HEY BLOGGIES,

I have been inside all day because of the wet cold weather.  I made some cards from my SSS Card Kit.  My first card I kept very simple because it is so pretty:


It was hard to catch in the photo, but I added sparkle glitter embossing powder to the two trees. I also colored in the two cardinal birds and added some self sticking sequins.  The Merry Christmas wouldn't fit on the outside, so I added it to the inside.

 This card I put two pieces of DSP.  And I cut out the HOHOHO and added the same sparkle glitter embossing powder.  I colored the red roofs and added some red sequins.

This one is my favorite.  I added a piece of striped paper on the right edge and then stamped some stars in both the green and the red inks.  I added both red and green sequins and stamped Merry Christmas in red.

Hope you enjoyed my cards.  As I do some more from this fun kit, I will post them for you.
Merry Christmas.  I feel like I need some music playing Christmas Carols this afternoon!!  GRIN

Saturday, November 21

CHARITY QUILTS

HEY BLOGGIES,

It's that time of year again:  where my friends and I get together to sew up charity quilts for our local community.  They are more like throws, blankets, "kivers", etc. than real quilts.  But we like to call them quilts.  Since our goal is to get a lot of them done, we don't do the normal hand quilting on them that takes soooooooo many hours.  Instead, we either quilt them by machine or just do some straight stitching here and there on them to keep them together during washings.

So, here are a few we made in the last two weeks.  There are only 3 of us so far working on these, but others are planning to come in the next few weeks:

 You can't really see the pattern on this soft and snuggly quilt, but it is little blue teddy bears.  The back is a rose red fleece so nice and cuddly.  This is a tied baby blanket.

 A few of the ladies have a long arm quilting machine and they are practicing with it.  They donated the pieces they long arm quilted and all we had to do was sew a binding on them.  This is one of them.  This is for a senior citizen for a lap blanket or wheelchair blanket.

 This is a great male pattern with tools and implements on the soft fleece.  The back is a beige and this one is also yarn tied.

Another one that was a practice piece for the long arm quilter.  I love the deep navy blue and the pretty pattern of blues on white on the other side.  I created a binding for this one for the two sides and for the top and bottom I used a self binding of the navy blue side back against the printed side.  It came out very nice I think.

I entered this at:
RICHARD AND TANYA QUILTS LAFF#194

LET'S MAKE BABY QUILTS

and a few more places I can't remember at the moment.  Sorry.  IF you see this post at a different place than these two above, please leave me a comment to tell me where you saw it!!  Thanks!!

Thanks for stopping by.  IF any of you have any fleece or flannel or soft fabrics we could use to make more baby blankets, we would be happy to receive that gift and will make more charity quilts.

More will be posted as we progress on our projects.  A very pretty embroidery machine applique is in the making and I can't wait to see it finished.

Friday, November 20

ONLINE EXTRAVAGANZA BEGINS MONDAY NOV 23RD

HEY BLOGGIES,

In honor of all the sales the retailers are offering, Stampin' Up! is offering a WEEK OF SAVINGS!!


Here is a link for you to down load the entire list.  Please notice there are a few SPECIAL DAY sales that are ONLY good on that day.  And ALL SALES ARE WHILE SUPPLIES LAST.

CLICK HERE FOR ALL SALE ITEMS ON THE EXTRAVAGANZA

IMPORTANT DETAILS TO NOTE:
  • Past Paper Pumpkin kits and kit refills in Online Extravaganza are available for purchase by subscribers and non-subscribers.
  • You must use bundle item codes provided for Online Extravaganza.  Discounts will not be applied if individual component item numbers are entered separately.  Bundles featured in Online Extravaganza will exist only during Online Extravaganza.
  • There is no minimum purchase necessary for Online Extravaganza.  Discounts will range from 20 to 50 percent.
  • Additional products from current catalogs may be purchased on the same order.  Don’t forget to check the holiday catalog retiring products list15% off bundlesweekly deals and clearance!
HAPPY SHOPPING!!!

Friday, November 13

NO CRAFTING, BUT FUN THINGS JUST THE SAME


HEY BLOGGIES,

So sorry I have not been posting cards lately, but I have been busy outside.  Here in South Central Texas, we have a full month in the fall and a month in the spring that is absolutely BEAUTIFUL outside weather.  The rest of the year it is hot hot hot and humid!!

So, needless to say I have been outside most every day the last two weeks enjoying our wonderful weather.  What have I been doing?  Working with my horses.  For those who might have missed it, I have two  Gypsy horses aged almost 3 years old.  I have been getting them trained for riding and then training myself to ride them as well.  They are half brothers just a week apart in age and they are SO FUN to be around.

They have blue eyes and long manes and tails.  They have "feather" on their legs, which means lots and lots of hair.  They are short, but stocky and so very, very friendly.

Here they are at training to pull a cart.  They did such a good job learning from Daniel, our Amish horse trainer. They are almost ready to start pulling for us. First we have to be trained how to drive them.

 Here is our trainer, Jeremy, on Brodie for saddle training.

 Getting Fergus ready for his riding lesson.


Look at those looooong white eyelashes on  my Fergus.  He is a handsome boy.  (So is Brodie, of course)  :-)

Thanks for stopping by. Next week I get to ride them and I can hardly wait!!

Have a happy week and do something creative.

Tuesday, November 10

AWESOME WEEKLY HOLIDAY DEALS!!

HEY BLOGGIES,


The Weekly Deals are AWESOME this week.  Getting ready for holiday cards??  This is YOUR WEEK to get them deeply discounted:

Metallic Foil Doilies  by Stampin' Up!


Festive Flower Builder Punch by Stampin' Up!
FESTIVE FLOWER BUILDER PUNCH
Price$18.00 $13.50


Snow Flurry Punch by Stampin' Up!


Price$18.00 $13.50


Perfect Pines Framelits Dies by Stampin' Up!
Price$27.00 $20.25

YOU CAN CLICK ON MY SIGNATURE LINE BELOW TO GO DIRECTLY TO MY WEB STORE.

Envelope Punch Board Flower VIDEO

Wednesday, October 28

Gift Bag Punch Board by Stampin’ Up! VIDEO

Gift Bag Topper VIDEO - Special Way to Use It

BUILDING QUILT SKILLS FOR BEGINNERS - A BOOK AND A HOP


YCQIBBlogHop  A blog hop is going on and it is especially helpful for beginners of Quilting.  Even for those who have quilted before, it is always good to refresh basic skills.  Here is the list of blogs and days as well as wonderful projects and the book behind the hop,.

Oct. 9 – Ch. 1. Basics - Leila Gardunia  http://sewnbyleila.blogspot.com
Oct. 12 – Ch. 2. HST - Tammy Silvers  http://www.tamarinis.typepad.com/
Oct 14 – Ch 3. QST - Connie Kresin Campbell http://www.conniekresin.com
Oct. 16 – Ch 4. Flying Geese - Maryellen McAuliffe http:// teachpany.blogspot.com
Oct 19 -- Ch. 5. Wonky - Christine McCrann Martinez http:// madeinscraps.blogspot.com
Oct. 21 – Ch. 6. Improvisation - Connie Kauffman http:// kauffmandesigns.blogspot.com
Oct. 23 -- Ch. 7. Foundation Paper Piecing - Joan Kawano http:// moosestashquilting.blogspot.com
Oct. 26 – Ch. 8. Curves - Marlene Oddie  http://kissedquilts.blogspot.com
Oct. 28 -  Ch 9. One-Patch Blocks - Bea Lee http://www.beaquilter.com
Oct. 30 – Ch. 10. Applique - Barbara Gaddy http:// bejeweledquilts.blogspot.com
Nov. 2 – Ch. 11. Inset Seams - Pamela Boatright  http://pamelaquilts.blogspot.com/
Nov. 4 – Ch. 12. Challenge Blocks - Linda Stewart Pearl http:// www.onequiltingcircle.com
Nov. 6 – Ch. 13. finishing – Marlene   http://kissedquilts.blogspot.com

Go check it out and leave a comment on their rafflecopter for a chance to win the book and some yummy batik fabric to try a project of your own!!


Monday, October 26

FUN CHUNKY HALLOWEEN DECORATIONS

HEY BLOGGIES,

I have been working on some Megan Suarez digi art for halloween.  I am making two coaster hangings for the wall.  I love LOVE LOVE Megan's artistic style and these cute little monsters are so stinkin' fun!!

I made these two art pieces to be hooked to hand side-by-side.  I am still in the process of finishing them, but I wanted you to see the coloring I have done so far with my alcohol markers.

 I started with my grey copics in four different shades.  These are made to be creepy and a little bit cute for HALLOWEEN.  I then colored his tshirt, his horns and around his eyes with three different greens.  The bat is only greys and white dots.  The bat, the skull, his horns and the one ugly eye of my little monster is 3D layering. Same below with Grandpa and little Granddaughter.

This is grandpa and the little granddaughter (in my mind).  I did the same steps with this coaster - first coloring/shading with my greys and then adding colors to the shirt,horns and eyes. Oh, also a white pen for the mouth and highlights on the shirts, skull, shoes, etc.

The spider web is a spider web doily that I have glued on and cut.  I am going to line them up better and then put a piece of card stock as a hinge on the back to keep them together.  There will be background coloring and lettering, as well as beads, sequins and I am not sure what else.

I had fun coloring them and am entering them into the 30 DAY COLORING CHALLENGE.

Stay tuned for when these are completed.

Tuesday, October 20

ALL STAMP SETS ARE 15% OFF THIS WEEK

HEY BLOGGIES,

HAVE YOU HEARD?  All stamp sets at Stampin' Up! are 15% this week.  Combine that with our Clearance Rack items AND our weekly specials  and you have a TON OF SAVINGS to take advantage of.


That bow builder punch is a MUST for the upcoming holidays.  AND the Designer Vellum is PERFECT for your Christmas cards.

As always, if you have any questions, let me know.


Friday, October 16

MORE NO LINE COLORING

HEY BLOGGIES,

Thanks to all who have been supportive and commented to me regarding this 30 Days of Coloring that I have been participating in.  You are very kind and make me want to keep trying to get better.

A few of you asked me to explain what makes no line coloring.  How do you stamp if there are no lines?  I am glad you asked that because at first I wondered about that myself.

There are several ways to stamp your image you are going to color.  The way I did it on this card below was I stamped with a very light color that was going to be in my color palette.

I have seen on the blog that some people use a light box and trace the image with a very very light pencil.

Others have used an pale ink that has been stamped once or twice off FIRST before then stamping it onto the water color paper.

I am sure there are other ways, I am sure and I would love to hear from you out there in bloggieland if you have used other methods for this no line technique.

On to my card:


 Here is my finished thank you card.  I  L.O.V.E. butterflies and have had butterfly gardens at my previous house just for the butterflies to be able to lay their eggs and the pupae to hatch. Just so you know WHY I am so happy with this card.

 Here is a close up of the largest butterfly.  The lines you see I added with a very very fine brush.  And the sparkle is none other than Wink of Stella clear.

I made the smaller butterfly to be darker around the edges and the shadows also darker.  The body is darker too.  You can see some very light extra small butterflies uncolored on the card as well.

Thanks so much for stopping by.  You still have time to participate in The Daily Marker 30 Day Color Challenge.