Showing posts with label 3 D PROJECT. Show all posts

Friday, November 22

ANOTHER ART PIECE CHRISTMAS GIFT TAG - PAPER PIECING

hey bloggies,

How did you like my art piece from yesterday?  I hope you enjoyed it.  Here is another inspired by the guy who is well known in the paper crafting world.  I love grunge and altered items and he does it so well, doesn't he?

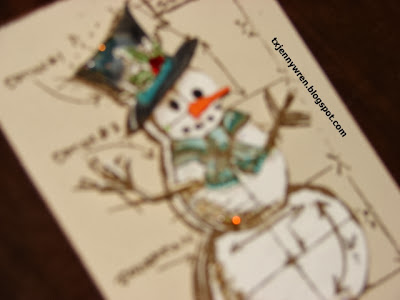
 I love PAPER PIECING - I call it 3-D imaging!  ha ha  I used three layers of stamped and cut out snowman pieces.

 The pieces of the snowman's hat, holly berries, nose, stick arms, and scarf are all 3-D pieces.  His body is also layered as you can see better in the next photo.

 For those of you who want to know the name of the stamp set and thinlits dies, please send me an email or leave a message where I can reply back to you.  I am not allowed to advertise other companies on my blog.

 I shaded him with some baked brown sugar ink and then added some dazzling details.


Although this last photo is out of focus, you can see very clearly the three layers I used here.

Here is a card I made with the same stamp set and dies:
I used a coastal cabana layer behind the top layer to coordinate with the snowman's hat band and scarf.

I have entered this at THE FRIDAY MASHUP - use crumb cake or craft.

Hope you enjoyed looking at my paper piecing 3-D imaging snowman.  It was so fun to create him and I am VERY PLEASED how he turned out!!

Friday, November 8

LITTLE BIRD HOUSE BOX

HEY BLOGGIES,

Today I have the cutest tall and thin bird house box for you.  Even though it is a box for a gift or goodies, I am going to make a bunch more for my Christmas Tree.  I decorate my tree in "woodlands" decorations with birds, pine cones, and natural elements.  So these little bird houses will fit in so cute!!

I saw this on you tube from a demonstrator from the UK.

 I wanted you to see just how tall and thin it is.  The card stock you start with is  6 1/2 x 7 1/2 inches.  It ends up being about 1" wide by 6 1/2 " tall.

 I didn't want a hole with the heart framelit for the bird door, so I sponged around a punched out heart to give the "hint" of the opening.  I think that works just fine for me.

A small pearl for her eye and she is all done.

What?  you would like the instructions?  Ok, your wish is my command.  Here you go:

TALL  AND THIN BIRDIE HOUSE BOX

Card Stock  6½ x 7 ½ inches.
Put the card stock long side across the top and score at 1, 3 ½, 4 ½ and 7
Turn it and score at 1, 5, 6

On the long skinny tab down one side, cut the very bottom little tab off.  Then cut slits at the score lines along the rest of this skinny side only up to the crossing score line.

Punch out heart with die, or use a punched out heart and sponge around it to create a halo.

Punch out two holes at top and thread 1/8" ribbon through and tied a knot.

Punch bird out and sponge around the bird and wing with cherry cobbler and around the leaf with green.
Add a small pearl for her eye.

SUPPLIES;
Bird punch, sponges, cherry cobbler ink pad, old olive ink pad, adhesive pearls, 1/8 ribbon, naturals ivory card stock.

Thanks for stopping by my blog today.  

Thursday, November 7

HOLIDAY BLOG HOP - DAY 3

HEY BLOGGIES,

Have you been enjoying the hop?  I certainly have and am inspired by everyone's projects.

One of the things I LOVE to make are these special banners that fold up into these metal cases.  I give them to special friends and they are also great to mail in an envelope.  The metal case protects them on their trip.

You can make the letters in several ways.  Use the Alphabet Die for your Big Shot, use the stencil that comes with the Banner Kit in the Holiday Mini Catalog, or I used some retired alphabet sheets that were on the clearance rack.

I used the wide 1 1/2" striped ribbon.  This year they have the beautiful cherry cobbler wire edged ribbon you could use.  Use TWO scallop squares and glue them on both sides of the ribbon for each letter.


I used the postage punch and some designer paper here, also a button.


I love adding the ornament inside the "O", and hanging it with a ribbon and cord.


We decorated each scallop square any way we desired.  Here is a button and a tree with pearls.


Putting it on our table protector pages, it gives you an idea of just how large and beautiful these are.

Here is the metal tin decorated and all tied shut to be delivered to that special someone.  The banner is folded up inside this pretty tin.  A GREAT gift!!

Hope you enjoyed my idea.  You can spell whatever you want and use whatever papers, ribbons, punches, and embellishments you desire to create your OWN banner.  HOPE, PEACE, LOVE, etc. are just a few suggestions for what you would make with YOUR banner.  I would love to see what you create.  Please share with me if you make one from my inspiration, won't you?  I would really enjoy seeing what YOU CREATE!!


Next up is my friend DE.  Click the next photo below and go see what fun she has prepared for you.


Sunday, September 8

HALLOWEEN BANNER

I CREATED A HALLOWEEN BANNER THAT I THINK IS SO CUTE!!

 Here is my version of the SPOOKY banner.  Each letter is on a 5 x 7 flag and decorated.

 Some up close views of the letters and my decorations on the banner.  I used DSP as a half-medallion, washi tape, DSP mini banners and flags, and punches.

The letters are from my BIG SHOT and the ALPHABET DIES.  I sewed the ribbon onto the banner.

Thanks for stopping by my blog today.  I sincerely appreciate your support!!  It makes it more fun to make projects when I know others appreciate them.

Hope to see you tomorrow.

Saturday, September 7

STILL HAVING FUN WITH HALLOWEEN PROJECTS!!

I WANT CANDY!!  Well, more specifically I WANT CHOCOLATE.  And what better way to give some chocolate as a gift than in a FUN and EASY MINI CHOCOLATE BOX.  This reminds me of the Whitman's Chocolates you get in a box this size but NOT this cute!!  How cute is this!!!

 Here is a mini chocolates box with a belly band to keep it closed.  This is another sheet from my fav dsp - Witches Brew.  I added 3 punched bats on top of some paper-made curlies as the medallion on the ribbon belly band.

Here is the box open with the belly band on the side.  AND YUMMY CHOCOLATES!!

Thanks for visiting my blog today.  Come back TOMORROW for ANOTHER HALLOWEEN PROJECT, won't you?  I am having so much fun making all these HALLOWEEN PROJECTS and sharing them with YOU!!

Until Tomorrow!!

Friday, September 6

MORE HALLOWEEN PROJECTS

HELLO BLOGGIES,

Welcome back to my blog.  I am so glad you are here today.  I have another fun Halloween project to share with you.

Another card using the Witches Brew dsp from Stampin' Up!  I am entering this card in the MOJO Monday challenge this week. I am loving the summer starfruit with the black and orange!!

I added a black ribbon with some white stitching and tied it in a knot.  I stamped on summer starfruit the "friends forever" with black ink and then layered it with black card stock.

 I stamped the cat with black ink and then used clear embossing powder.   Here is a closeup of the scaredy cat element.  Cute, huh? I wish the shine showed up in the photo.  In real life it is awesome!!

Thanks for stopping by.  I would sincerely appreciate your comments and support.  Stop by TOMORROW for another HALLOWEEN PROJECT, won't you?

This card is entered at:

MOJO MONDAY
Freshly Made Sketches

Thursday, September 5

BLOG HOP DAY THREE - PUMPKINS AND CROWS -- BOO

Here is the other side of my Halloween display at my home.  We have crows every spring who make a nest in our neighborhood and raise a few babies.  Trivia:  What do you call a flock of crows??  Answer:   It is called a murder of crows.  I have NO IDEA WHY!!

I used the Witches Brew Designer Paper Pack again for my adorable little pumpkins.  And the stem is just some brown packing paper scrunched up and glued on the top.  I think I need to add some vine curlicues or leaves to them, what do you think?

The crow, of course, is not real and is from the Dollar Store. But he fits perfectly with my field of pumpkins I think.

My card I created is an easy, quick card made with the Halloween Washi Tape and the Halloween Happiness Stamp set.


I stamped with versamark on black card stock and tangerine tango embossing powder heat embossed. Then I layered it to Witches Brew designer paper and onto 4 pieces of Washi Tape.  The base of the card is summer starfruit, which is one of the colors in the designer paper.

The added BLING is the clay embellishment.  Isn't it awesome??!!  I added a few drops of pumpkin pie to the stampin pressed clay, then I inked up the sentiment SPOOKY in black ink and pressed it down into the clay.  I let it dry and it was too light in color for me.  So I used my marker to color over the pumpkin pie clay again.  I used a bronze piece of stretch cord to attach it to my card.  What do you think of this NEW TECHNIQUE I invented?  This clay is amazing and in the next few days I will be showing other things I have done with it.

Thanks for visiting my blog and for following us on this three day blog hop.  We appreciate it so very much when you leave a comment for us.

TOMORROW I have 3 more projects to share with you.  PLEASE stop by to see the fun cards, banner and a different treat box with bellyband.

We will have another blog hop the first week of OCTOBER.  Mark your calendar to come on back then, ok?

Click the photo NEXT below to go to Tamara's blog to see her goodies she has made for you.

 The lineup of all the blogs in this hop are as follows:

1.  Dawn G (our Manager)
2.  Jennifer or TXJennywren (Thats ME)
3.  Tamara G
4.  Jan M
5.  Ronnel S
6.  Dee S
7.  De W

I have entered the card at:

The Friday Mashup:  Washi, Washi, Washi

Wednesday, September 4

HALLOWEEN BLOG HOP --- DAY TWO

HELLO BLOGGIES,

Did you enjoy all the projects that were shared yesterday??  Me too!!

Ready for some more fun??  Here goes:

Today I wanted to share another treat container and matching card using the WITCHES BREW designer paper from the HOLIDAY CATALOG.


 I love this larger sized box!!  Sometimes you need a bigger box with a lid for those substantial sized treats, don't you?   And the cover keeps fingers out of YOUR goodies if they are sitting on your desk at work, etc. right?  ha ha

 I created the banner with two score lines at each end then folded to make it a 3 D banner.  The lid is made with the scallop square die and a thin strip of dsp, with a piece of ribbon on the top.


I made this card to go along with the treat to share.  Both these items are perfect for your Halloween display on your desk at work or on your table at home.  The card has another banner but this time it is not a 3 D banner, but simply each end has a stampin' dimensional to give it just a bit of a lift.

Thanks for stopping by my blog.  The next blog in this hop is TAMARA G.  Click the NEXT button below to go to see her creations for today.
List of bloggers:
1.  Dawn G
2.  Jennifer K or TXJennywren (THAT's me)
3.  Tamara G
4.  Jan M
5.  Ronnel S
6.  Dee S
7.  De W

Thanks for joining us on our blog hop.  Please consider becoming a follower of my blog so you won't miss future creations.

The box is entered at:
SUO Challenges

The card is entered at:
Techno Stamper Monday Lunchtime Challenge


Tuesday, September 3

HALLOWEEN BLOG HOP --- DAY ONE

HELLO BLOGGIES,

Welcome to our GLITTER QUEEN HALLOWEEN BLOG HOP.  I am so happy that you have stopped by to see what I made for you today.  Are you loving the Holiday Catalog as much as I am??  There are so many ideas and wonderful new products inside to provide inspiration for our creativity.

Here are my projects for you today:


I have seen this idea on several blogs and know I HAD to make one.  It is from less than 1 sheet of DSP - Witches Brew.  I bought an inexpensive frame at the W store and used the top 1/3 of one sheet of the paper.  EASY PEASY


The bottom 1/4 of the same sheet of paper was used to decorate this cute little goodie box filled with chocolate yummies.  Black card stock is the base of the box with the designer paper decorating it.

Here is another photo of the display.


Thanks for stopping by today.  Come back tomorrow to see MORE PROJECTS for FALL. Click the pumpkins below to go the NEXT BLOG, which is TAMARA GADBERRY'S blog.


Here is our complete list of blogs for these three days:

Dawn Griffith (our Manager)
Jennifer Kay, or TXJennyWren (THAT'S ME)
Tamara Gadberry
Jan Mougel
Ronnel Stephanik
Dee Slater
De Williamson


Wednesday, August 28

THANK YOU CANDY BAR COVER

Sometimes we just need a quick little treat to show our appreciation to someone...teachers, friends, babysitters, neighbors, etc.  I created this simple and quick thank you after I saw an idea on the web from another demonstrator.  I am sorry I don't know the name of the demo and the photo did not have a water mark on it.

 I used rich razzleberry as the color with my whisper white.  I used both chalk talk and flower shop stamp sets, punches and dies.  I also used fire and ice brads for the center of the flower.

This designer paper is covering a Hershey's milk chocolate candy bar.  Just the perfect little treat to show someone you care!!


Thanks for stopping by my blog.  Stop by again for some more photos of my creations.

ESPECIALLY plan to stop by on Sept 3, 4 and 5 because I will be in a Halloween blog hop with several of my friends and we have some fun things planned for you.